
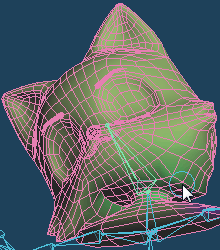
(bone_sample.mqo)
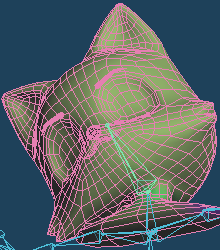
(bone_finished.mqo)
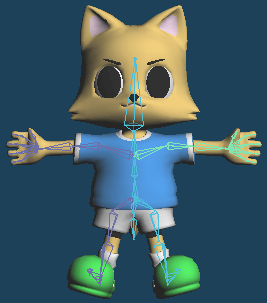
If you set bones, you can change the pose of the character model.
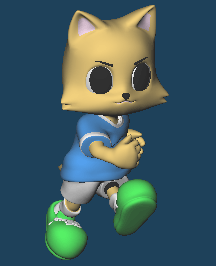
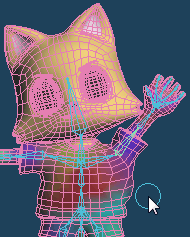
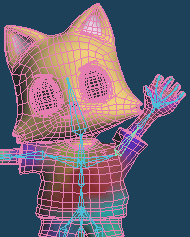
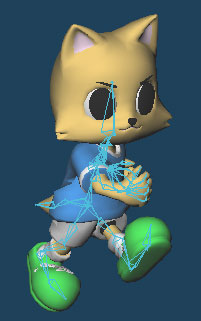
In this tutorial, you set the bone to the sample file shown on the left. And, make a pose in the right figure.
Note: Sample files for this tutorial are in the [SampleModels] under the Metasequoia folder.
|
|
| Sample file (bone_sample.mqo) |
Completion (bone_finished.mqo) |
Select edit mode to [Modeling(String)] or [Modeling(Icon)].
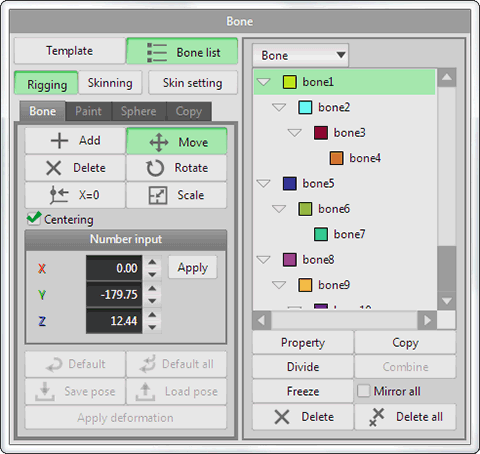
Click [Bone] in the command panel and open the bone panel.
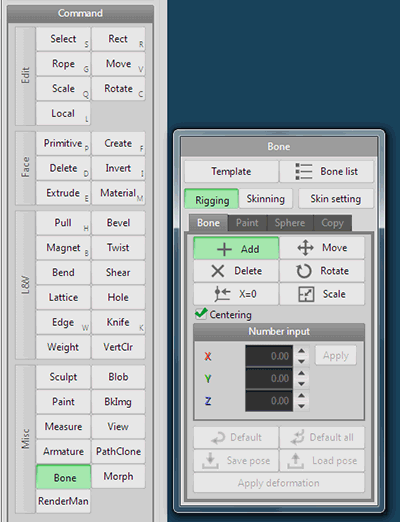
Let's make the bone. Check the bone panel to select [Bone > Add] in [Rigging]. So, you can create a new bone.
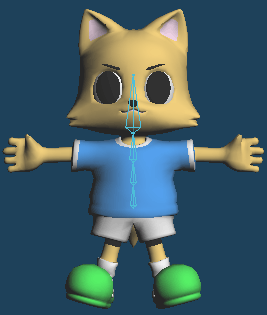
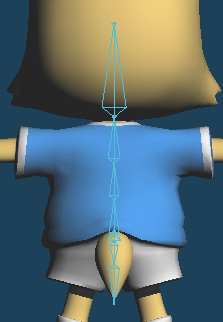
First, add the spine bone. Starting point is the center of the body. Check [Centering] and drag to create a bone. Drag again from the tip of the created bone. Connected bones are created. By repeating this operation, create bones of head as shown in the figure below.
 |
 |
Then, extend bones from the previous start point to the tail.
 |
 |
If you check [Centering], bones is set in the center of the body. You need to accurately place the bone on the central axis (X=0).
Click [X=0] in the bone panel. Click on the bones through the center. So, bone is placed in the center (X=0).
 |
 |
 |
| Click the bones | Bone is moved to the X=0 position |
Create leg bones. You set only the right half. Please click [Add] in the bone panel.
Drag from the start position of the spine bone, and extend the bone. Bone is like a triangular pyramid-shaped. Tip of triangular pyramid will be joint. Place bones to set the joint in the base of the foot and knee and ankle and the finger base.
 |
 |
If you fail to placement, select [Move] in the bone panel and drag a bone to modify.
Since leg is symmetrical, set the mirror symmetry.
Click [Bone list] in the bone panel and open the bone list.
Click while holding down the Shift key the bones from hip to toe. The bone selected on 3D view is selected on the bone list.
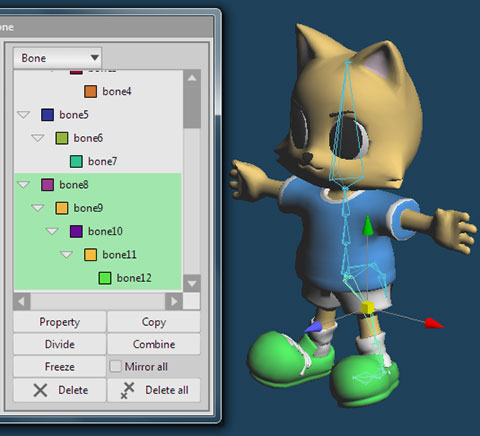
Right-click on the selected bone on the bone list. Select [Mirror] from the menu.
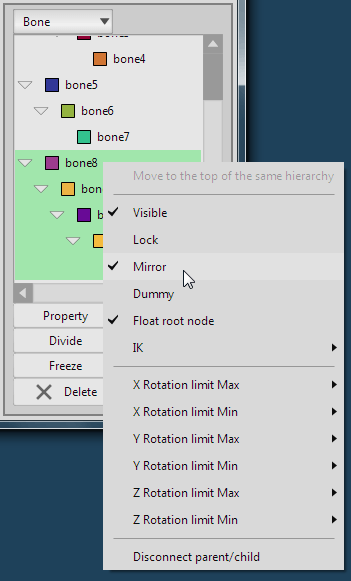
Leg bones has been mirrored.
Then, create the arm bones. Extend from the back bone by [Add].
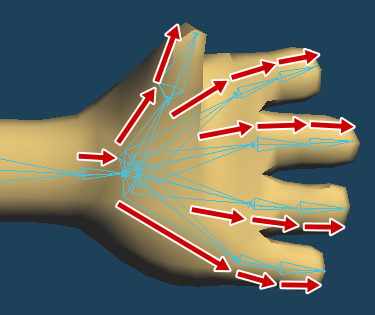
Since the hand has a lot of joint, bone increases.
Because this character has been simplified, set the joint at the base and middle of the finger. If it is real humanoid model, joints are set three places. place bones with care.
Since the hand is also symmetrical, mirror the bone. The procedure is the same as the case of the leg bones.
Click while holding down the shift key and select bones from the shoulder to the fingertips. Right-click on the bone list, select [Mirror] in the menu.
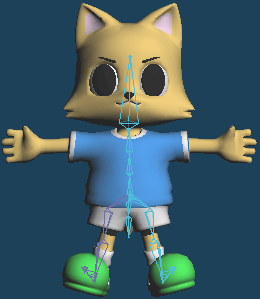
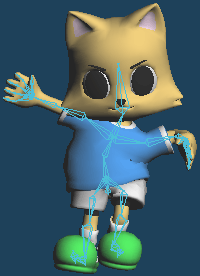
Bone placement is complete. If you want to do, it is good to set the bones from head to ear.
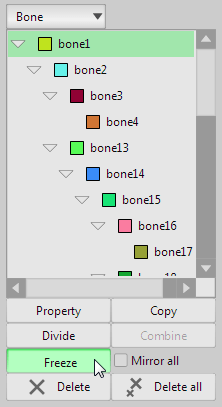
Materialize the mirror bones of left side of the body.
Click [Freeze] at the bottom of the bone list.
Bones of the left side of the body have been materialized.

Set the range of influence of each bone.
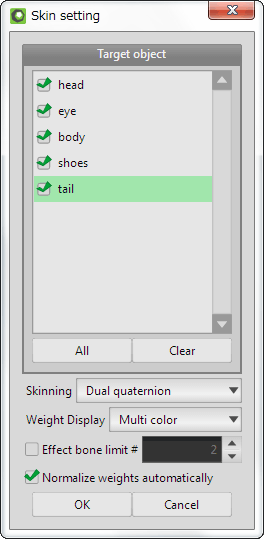
Click [Skin setting] and open the panel of skin setting.
If there is an object that is not affected by the bone, don't check it. This time, click [All] and select all objects.
And, select [Dual quaternion] in [Skinning]. When deforming the object by the bone, the method of deformation is different from linear. I think that [Dual quaternion] is suitable for deformation of joint of character.
Press [OK], and set automatically the range of influence.
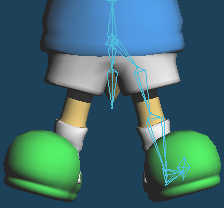
Let's move the bones for motion confirmation.
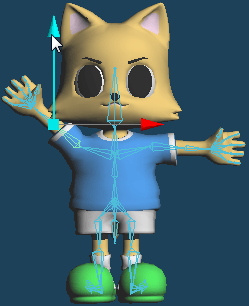
First, move the head bone.
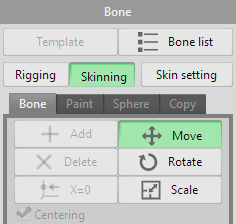
Select the mode of [Skinning] and [Move].
Drag and move the tip of the head bone in the horizontal direction. To match the movement of the bone, the object is deformed.
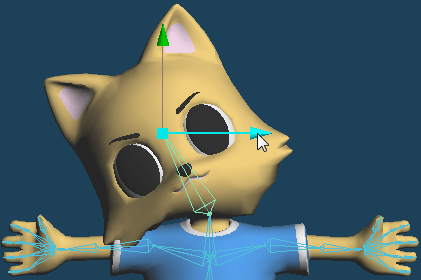
Part of the jaw (The figure below, the part that is surrounded by a red line) has distorted.

Influence of bone is too small for this part. Let's modify.
Select the head object in object panel. And, hide the other objects to display only head.
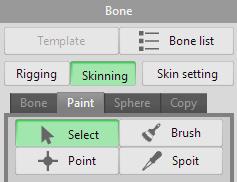
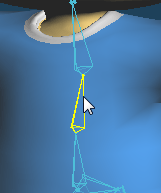
Click [Select] in [Paint], and select the bone in the head.
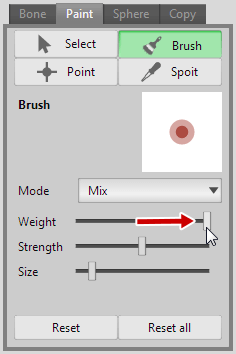
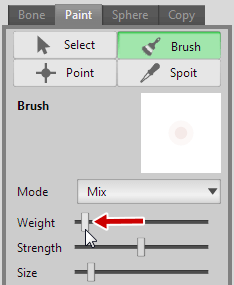
Select [Brush].
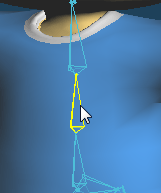
Because we want to increase the range of influence of bone, move the slider of [Weight] to the right.
Drag the modified part and adjust.
Right figure is revised. Deformation of the face has been fixed.
 |
|
 |
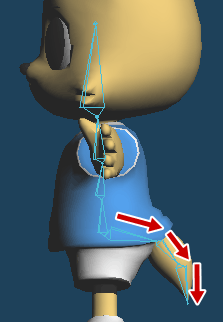
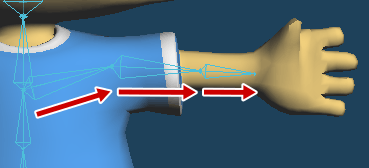
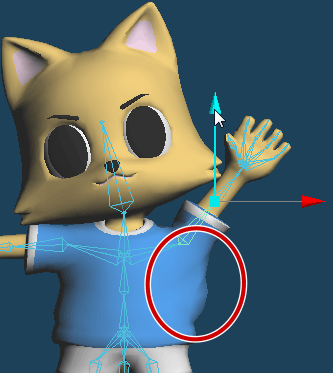
Then, move the arm.
Select [Bone] > [Move] in [Skinning]. Drag the tip of the arm bone above. Shirt has moved along with the arm (in the figure below). Fix this.
Select the body object in the object panel.
In [Paint], select the arm bone by [Select] and click [Brush].
To reduce the influence of the bone, move the slider of [Weight] to the left. And drag the fix point.
Unnatural deformation of the shirt has been improved.
 |
|
 |
Move and check other bone in [Skinning]. Fix the symmetrical bone of limbs only right side of the body.
This result seems to good.
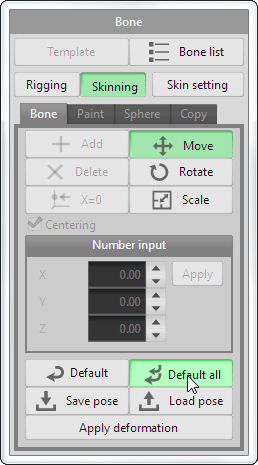
Reset the position of the bone to the default.
Click [Default all] in [Bone]. Bone is returned to the initial position.
Weight of the right side of the body has been fixed. Left side of the body is unmodified. Let's copy the weight from the right side of the body to the left.
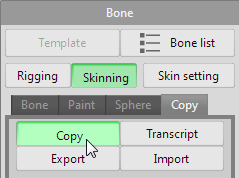
Click [Copy].
Set property in this sub panel.
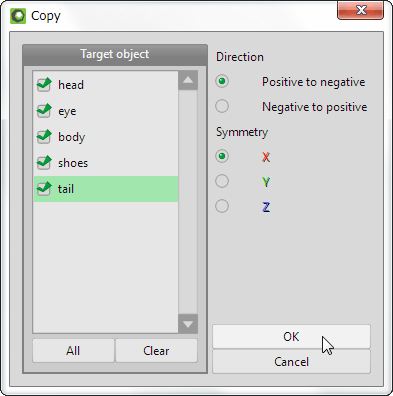
To copy from right to left, [Direction] is [Positive to negative] and [Symmetry] is [X]. Click [All] and select all object. And press [OK].
In this, weight setting is symmetrical.
To try, move the left arm. Drag the tip of the left arm bone by [Bone] > [Move] in the [Skinning] mode. You can be seen that the deformation of the shirt is reflected in the left side of the body.
After the confirmation, click [Default all].
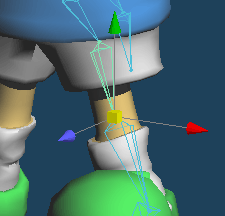
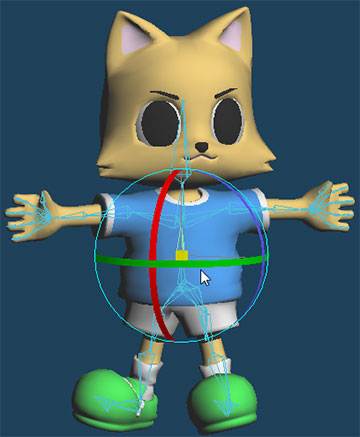
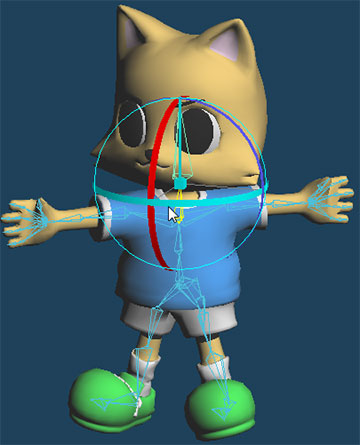
Finally, let's create the pose of character. Manipulate bones by [Bone] in [Skinning].
Click and select the spine bone. Click [Rotate] and drag green handle to twist the body.
Select the face bone, and twist the head to reverse rotation by [Rotate].
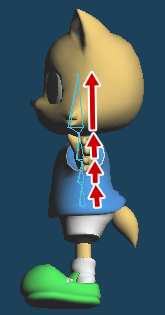
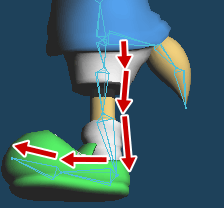
Raise the right foot. Drag the tip of the knee bone to top by [Move].
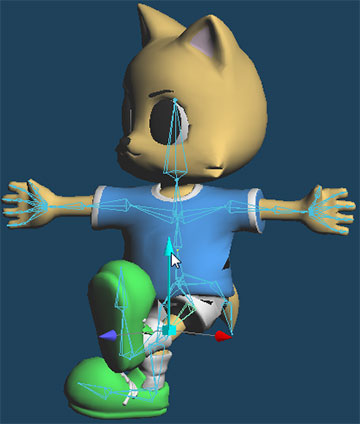
Retract the left foot. Drag and retract the left knee bone by [Move].
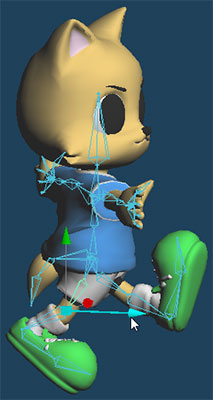
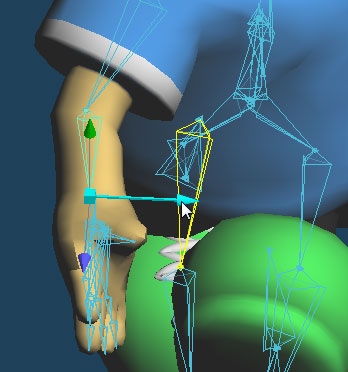
Make a pose in arms. Drag the tip of the elbow bone by [Move]. Left arm is in front. Right arm behind.
To move the wrist bone, bend the elbow.
Bend the wrist. Drag as shown in the figure below by [Move].
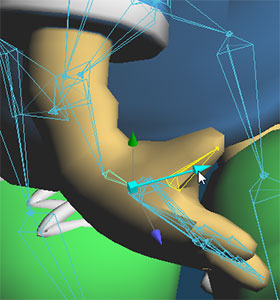
Bending the finger, it looks natural.
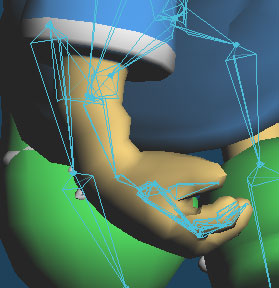
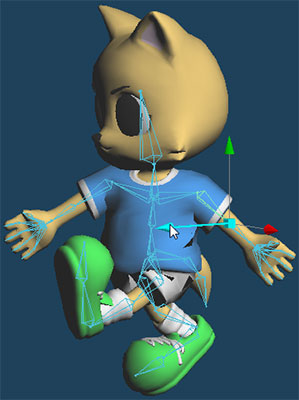
Adjust the overall balance by [Move] or [Rotate].
After the pose has been completed, click [Apply deformation].
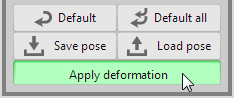
Click [OK].
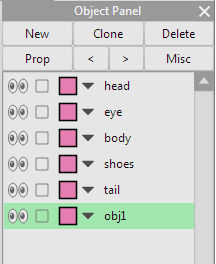
Check the object panel. New object obj1 has been generated. This is the object that was deformed.
If necessary, delete or hide the object before deformation.
This is complete.