1. Setting a Patch
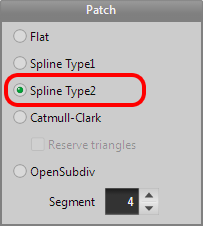
Select the [Menu > Panel > Object Panel], and press [Property] button on the object panel. And choose 'Spline Type 2' as a patch setting.
(You can also use 'Catmull-Clark' instead.)
This tutorial shows how to make a right hand with [Extrude] and [Knife] based on a primitive without using [Create] command. It appears to be easy to model a hand as you can directly watch your hand and you know it very well.
Select the [Menu > Panel > Object Panel], and press [Property] button on the object panel. And choose 'Spline Type 2' as a patch setting.
(You can also use 'Catmull-Clark' instead.)
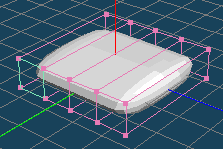
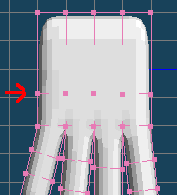
First, make a palm.
Select the [Primitive] command and push the 'property' button to open dialog. Set a segment, X=4, Y=1, Z=1, and the size of Y to 50 and make a primitive.

First, make the little finger.
Select a face like a right figure, set the offset about 150 in [Menu > Selected > Extrude faces].
(You can do the same with ([Extrude] command.)
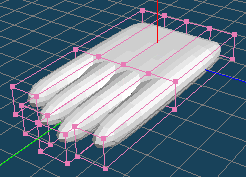
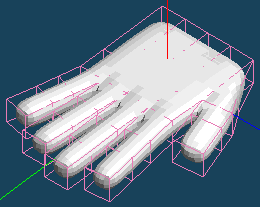
Then do in the same way to make the third finger, the middle finger, and the first finger. Set the offset to 180, 200, 180 for each and you can make like the figure on the right.
Move the faces of the fingertips a little to separate four fingers with [Move] command.
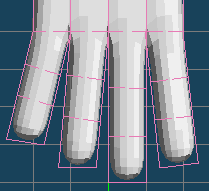
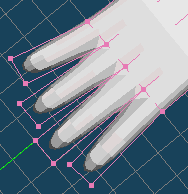
Make a cut for a joint of a finger with [knife] in [Knife] command in the top view. Please be careful not to make wire touch other fingers this time.
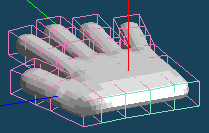
In making a thumb, the base of the thumb becomes big if you directly extrude the side of the palm. It is necessary to divide the palm into front and back.
Make a cut in the figure point with [knife] in [Knife] command.
Select the face like the figure and extrude the face with [Menu > Selected > Extrude faces] to make the base of the thumb.
Move the extruded face. And select and extrude the face to make a thumb like the figure.
Make joints in fingers with[knife] in [Knife] command as shown in the figure.
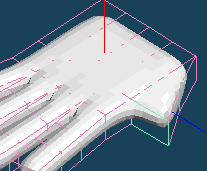
Next, make a wrist.
Select four faces at the back and extrude them with [Menu > Selected > Extrude faces] like the figure.
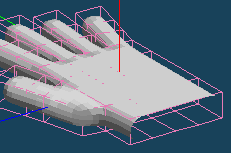
As four faces at the back are no more needed, delete them with [Delete] command or [Menu > Selected > Delete] after selecting faces.

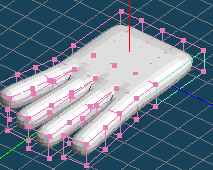
Arrange the shape by making the base of fingers bony or making fingertips slender or making the wrist rather round with [Bevel] in [Extrude] command.
Then, open Material Panel with [Menu > Panel > Material Panel] and make 2 materials with [New] button and select color with [Prop] button. And, attach to faces with [Material] command.
Finally, change curved surfaces to polygon with [Menu > Object > Freeze] and check [Menu > View > Smooth shading]. Then you can make the fine object like the figure.
The number of vertices is 1781 and the number of faces is 1760. An object before freezing is attached in 'hand.mqo'.